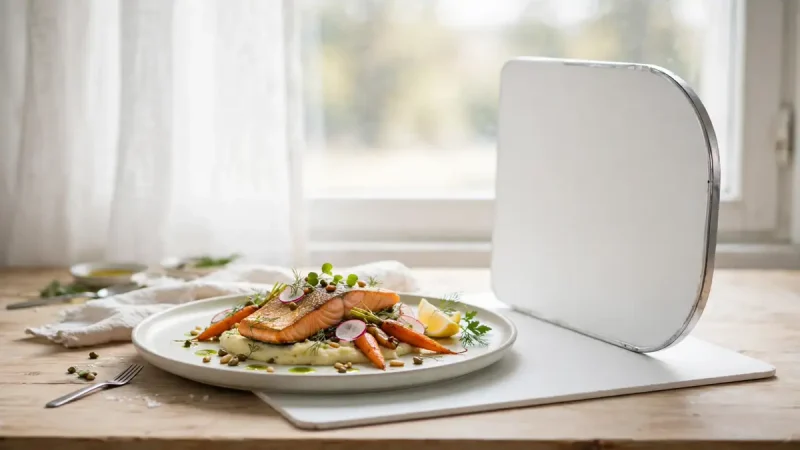

Moreover, great food photos are made with light, not expensive cameras. Moreover, Master food photography lighting and your phone shots will look professionally styled.
In this guide, you will learn the window-light setup pros use, how to shape light with cheap modifiers, and when to switch to artificial light. Additionally, you will avoid the mistakes that ruin food photos. Let us light it up.
Why Lighting Matters Most
Light creates the shape, texture, and color that make food look appetizing. Controlled light reveals crispy edges, glossy sauces, and fresh colors. Even a humble subject proves the point — chocolate-dipped pretzels turn glossy and rich under soft side light, yet look flat and dull under a ceiling bulb. Furthermore, Harsh or wrong-colored light does the opposite — flattening food and adding ugly yellow casts.
The good news: you do not need studio gear. A window, a $10 foam board, and a sheer curtain outperform expensive equipment used badly. In addition, understanding light direction matters more than owning lights.
The Window Light Setup (Start Here)
Place your table 1–3 feet from a large window — north-facing is ideal for consistent, diffused light all day. Turn off all indoor lights to avoid mixed color temperatures. Position the dish so window light falls from the side or slightly behind.
In addition, Side lighting is the default choice. It rakes across the food, creating shadows that reveal texture — crispy crusts, flaky layers, glistening sauces. In addition, it gives every dish natural dimension.
Backlighting places the food between you and the window. It creates a gorgeous glow around translucent foods — drinks, soups, salads — and makes steam dramatically visible. Furthermore, it is the secret behind those dreamy beverage shots.
Avoid front lighting. Light coming from behind the camera flattens everything, erasing the texture that makes food appealing. If your only window is behind you, reposition the table.
Shaping Light With Cheap Modifiers
Diffuser: Soften Harsh Light
Direct sun through a window creates hard shadows and blown highlights. Hang a sheer curtain, white sheet, or even parchment paper over the window to scatter the light. Cloudy days do this naturally — overcast skies are a giant free softbox.
In addition, diffused light flatters every food style, from bright and airy to rustic. A $30 5-in-1 reflector kit includes a diffuser panel that lasts years.
White Reflector: Fill the Shadows
In fact, Place a white foam board (about $10 at craft stores) on the opposite side of the food from the window. It bounces light back into the shadow side, revealing detail without killing dimension. Move it closer for stronger fill, farther for subtlety.
This single trick separates amateur from professional results. Furthermore, aluminum foil wrapped around cardboard makes an even stronger reflector for dark days.
Black Card: Add Drama
Moreover, Swap the white board for black foam board to deepen shadows selectively. This creates the moody, dramatic look popular in editorial food photography. In addition, black cards add contrast that makes colors pop.
When to Use Artificial Light
Natural light is inconsistent — weather, seasons, and shooting schedules do not always cooperate. Continuous LED panels or a softbox let you shoot anytime with repeatable results. Position artificial light exactly like a window: to the side, diffused.
Set white balance manually rather than auto — mixed lighting confuses cameras and shifts colors between shots. Never mix warm restaurant bulbs with cooler LEDs; pick one temperature. Furthermore, continuous lights beat flash for beginners because you see the effect in real time.
Furthermore, a basic setup — one LED panel ($50–$100) plus a softbox — handles most food work. Restaurant photographers rely on artificial light for consistency across shoots.
Common Lighting Mistakes
Overhead kitchen lights: They cast unflattering yellow tints and top-down shadows. Always turn them off when shooting near a window.
Built-in camera flash: Creates harsh glare and unnatural reflections that make food look greasy and flat. In addition, it kills the ambient mood entirely. Never use it.
Direct midday sun: Bleaches light-colored foods and casts stark shadows. Diffuse it or wait for softer light. Furthermore, golden hour (early morning, late afternoon) gives the most flattering warm light.
Mixed light sources: Window daylight plus tungsten lamps creates impossible white balance. Choose one light source and eliminate the others.
Quick-Start Checklist
- Table 1–3 feet from a large window; indoor lights OFF
- Light from the side (texture) or behind (glow); never from the front
- Diffuse harsh sun with a sheer curtain or white sheet
- Moreover, White foam board opposite the window to fill shadows
- Shoot on cloudy days or during golden hour when possible
- For artificial light: one LED + softbox, positioned like a window
Frequently Asked Questions
What is the best lighting for food photography?
Soft, diffused natural light from a large window — ideally north-facing. Side lighting reveals texture; backlighting creates glow. Furthermore, Furthermore, diffusers and reflectors shape it perfectly.
Can I use artificial light for food photography?
Absolutely. Continuous LED panels with a softbox mimic window light and give consistent, repeatable results. Set white balance manually and avoid mixing color temperatures.
Why do my food photos look yellow?
Overhead tungsten lights or auto white balance under mixed lighting. Turn off indoor lights, shoot in daylight, and set white balance manually. Shoot in RAW for easy correction.
Do I need expensive equipment?
No. A window, $10 white foam board, and a sheer curtain handle 90% of food photography. Skill with light direction matters far more than gear. Compact cameras tell the same story — the Insta360 Go 3 action camera packs serious capability into a tiny, affordable body.
What time of day is best?
Overcast days anytime, or golden hour (early morning/late afternoon) on sunny days. Avoid harsh midday sun unless diffused. Furthermore, north-facing windows give consistent light all day.
Conclusion
Master food photography lighting and every dish you shoot will look delicious. Start with a window and a foam board — the rest is practice.
For more food guides, explore our food and beverage section.