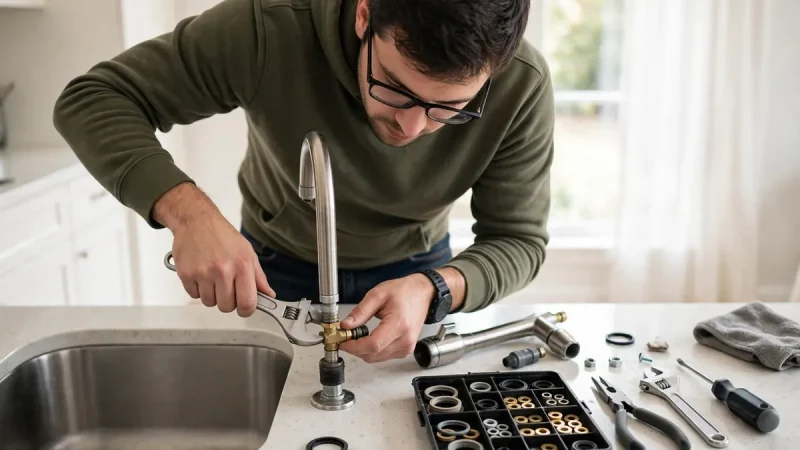

How to Fix a Dripping Faucet: A Step-by-Step Beginner Guide With Basic Tools
That steady drip at night can drive anyone mad, right? You hear it from bed, so you close the door. Still, the sound finds you again by morning. Learning how to fix a dripping faucet ends that noise for good. Indeed, most drips come from one small worn part. So a calm beginner can fix most leaks in one afternoon.
This guide walks you through each stage in plain order. Firstly, you will make the area safe and dry. Secondly, you will find your faucet type and faulty part. Thirdly, you will fit the new part with care. As a result, you finish with a quiet, dry sink. Ready to silence that drip with your own hands?
Why does a small drip deserve your attention today?
A tiny drip looks harmless, yet it never stays tiny. Each drop, for example, stains the sink over time. Also, constant moisture feeds limescale around the base. Consequently, a small fault slowly damages seals and finishes. In fact, a dripping tap can waste a surprising amount of water over a year, even as a rough general estimate. So early action protects both your sink and your bill.
Water also finds hidden paths inside the cabinet below. Damp wood, for instance, swells and starts to smell. Then mould can grow in that dark, warm space. Therefore, a quick repair prevents a much bigger job later. Still, you need no panic before you start. Most home faucets use simple parts and simple logic. Can you spare one quiet hour for this fix?
Safety first: How do you prepare the area well?
Safety always comes before speed on any water job. Always turn off water supply under sink first before you touch any part. That single step, indeed, prevents a sudden spray of water. Then open the faucet and drain the remaining pressure. Also, lay a towel inside the sink basin now. As a result, dropped parts land softly and stay visible.
How do you turn the water off with confidence?
Look under the sink for two small oval valves. One valve, for example, feeds the hot water line. Another valve feeds the cold water line instead. Turn each valve clockwise until it stops turning. Then lift the faucet handle and check the flow. The water should slow, then stop within seconds. If water still runs, close the main home valve.
Some older homes hide stiff or missing shutoff valves. In that case, stop and think before you force anything. A stuck valve, however, can snap under hard pressure. Indeed, a broken valve turns a small job into flooding. So test the valve gently with your hand first. Does the valve turn smoothly, or does it resist?
How do you protect small parts and your worktop?
Small screws vanish faster than any tool you own. Next, plug the drain so screws do not fall in during the whole repair. Then place a shallow tray beside the sink. Drop each screw and clip straight into that tray. Also, take a quick photo before each removal step. Those photos, in short, become your rebuild map later.
Protect the sink surface with an old folded towel. Metal tools, for instance, can chip enamel very easily. Also, keep a dry cloth close for drips. A tidy workspace, consequently, keeps your mind calm too. Above all, work slowly and keep parts in order. Rushing causes most beginner mistakes on this job.
What tools do you need for this simple repair?
You need fewer tools than most beginners expect here. The basic tools needed adjustable wrench screwdriver sets and a cloth cover most jobs. Indeed, one adjustable wrench fits many nut sizes. Also, flathead and Phillips screwdrivers handle most handle screws. So borrow missing items before you start the repair.
- Adjustable wrench for packing nuts and supply lines.
- Flathead and Phillips screwdrivers for handle screws.
- Allen key set for modern single-lever handles.
- Needle-nose pliers for small clips and springs.
- Old towels and a shallow parts tray.
- White vinegar and a soft cloth for cleaning.
- Plumber’s grease and spare washers or O-rings.
- A bucket for draining trapped water safely.
Also, keep your phone nearby for step photos. Its torch, for example, lights the dark cabinet space. Then place every tool within easy arm reach. Consequently, you never hunt for gear mid-repair later. In short, good setup makes the repair feel easy. Have you gathered your tools into one neat row?
How can you tell where the leak really starts?
Diagnosis saves money because you replace the right part. Understanding leak from spout vs leak from handle causes helps you find the fault fast. A spout drip, for instance, points to inner seals. In contrast, a handle leak points to outer O-rings. So dry the faucet fully and watch it closely.
Firstly, wipe the whole faucet with a dry cloth. Then wait and watch where water appears first. Does water bead at the spout tip slowly? Or does moisture gather around the handle base instead? That first wet spot, indeed, reveals the true source. Also, check the cabinet below for hidden damp patches. Sometimes the real leak hides under the sink entirely.
While you clean the area, check nearby surfaces too. Bathroom cleaning habits matter here, just like grout cleaning protects tile from hidden moisture damage. Indeed, dry surfaces reveal new leaks much faster. Also, sniff the cabinet for a musty smell. That smell, in fact, signals long-term hidden damp. So trust your eyes, hands, and nose together.
How do you identify your faucet type before opening it?
Each faucet family hides a different sealing system inside. Firstly, identify your faucet type compression cartridge ball models each need a different repair approach. Two handles, for example, usually mean compression or cartridge. One lever, however, often means ball or cartridge. So count the handles and watch their movement first.
How does a compression faucet feel in daily use?
A compression faucet tightens as you close it. You turn the handle and feel growing resistance. Inside, a threaded stem presses a rubber washer down. That washer, in fact, seals against a metal seat. Over time, the washer hardens, cracks, and leaks. Consequently, the spout drips even when fully closed. This older design appears in many utility sinks.
How does a cartridge faucet behave when healthy?
A cartridge faucet moves smoothly with little effort. One cartridge, for instance, controls flow and temperature together. You lift or turn the handle in one motion. Inside the body sits a removable plastic cylinder. That cylinder contains the seals and moving ports inside. When it wears, you replace the whole unit. Indeed, cartridge swaps rank among the easiest repairs.
How can you spot a ball or ceramic disc faucet?
A ball faucet uses one handle over a rounded cap. The handle feels loose and moves in many directions. Inside, a slotted metal ball controls the water mix. Springs and rubber seats sit below that ball. In contrast, a ceramic disc faucet feels firm and precise. Its handle turns through a short quarter arc only. Ceramic discs rarely fail, yet their seals can leak. So identify the feel before you buy parts.
Step by step: How do you fix a compression faucet?
Compression repairs follow a calm and logical order. Firstly, pop off the decorative handle cap gently. Then remove the handle screw with your screwdriver. Next, lift the handle straight off the stem. Also, photograph the exposed parts before moving deeper. That photo, indeed, guides your rebuild later on.
- Unscrew the packing nut with your adjustable wrench.
- Turn the stem out of the faucet body.
- Remove the small screw holding the washer.
- Fit a new washer of the exact same size.
- Replace the stem O-ring if it looks worn.
- Screw the stem back into the body firmly.
Often you simply replace worn washer or O-ring faucet parts to stop the leak. Match each new washer by size and shape. A loose washer, however, leaks again within days. So take the old parts shopping with you. Also, check the metal valve seat below carefully. Does that seat feel rough under your fingertip?
How do you deal with a rough valve seat?
A rough seat shreds new washers very quickly. Firstly, run your fingertip across the seat surface. Light roughness, for example, may polish out gently. Deep grooves, in contrast, need a seat dressing tool. That tool grinds the seat flat and smooth again. Still, deep damage sometimes means a new faucet. Indeed, honest checks now save repeat repairs later.
How do you clean parts and fit new O-rings?
Clean parts seal better and last much longer. Then clean mineral buildup with white vinegar on a soft cloth. Leave the cloth on crusty spots for ten minutes. Also, rinse every part with clean water afterward. Consequently, grit never traps under your new seals. Never scrape chrome with a metal tool, though.
Old O-rings often look flat, cracked, or stretched. Slide each old ring off with your fingernail. Then roll the new ring into its groove gently. Apply plumber’s grease on new O-rings before you fit them back. That grease, in fact, helps the ring slide smoothly. Also, it protects rubber from early drying out. So use a thin smear, never a thick blob.
Step by step: How do you replace a cartridge?
Cartridge swaps feel easier than washer repairs overall. Firstly, remove the handle and its retaining parts. Then find the small clip holding the cartridge. Pull that clip out with needle-nose pliers carefully. Also, note the cartridge position before you pull. Its tabs, indeed, must return to the same slots.
- Grip the cartridge top with pliers firmly.
- Twist it slightly to break the seal loose.
- Pull the cartridge straight out of the body.
- Clean the empty body with a vinegar cloth.
- Push the new cartridge into the same position.
- Refit the retaining clip and the handle.
Matching matters more than brand loyalty on cartridges. Always take old cartridge to hardware store for match before you buy a new one. Staff, for example, can compare stems and lengths. A near match, however, rarely seals correctly inside. So insist on the exact size and shape. Indeed, five extra minutes save a second trip.
What if the cartridge refuses to come out?
Stuck cartridges frustrate many beginners at this stage. Firstly, twist the cartridge gently from side to side. Then pull upward with steady, even hand pressure. A cheap cartridge puller tool also helps greatly. That tool, in fact, grips and rotates safely. Still, never yank with sudden violent force here. Excess force can crack the faucet body itself.
Step by step: How do you service a ball faucet?
Ball faucets hide several small parts under the handle. Firstly, loosen the handle setscrew with an Allen key. Then lift the handle off the rounded cap. Next, unscrew the cap and lift out the ball. Also, keep every spring and seat in order. Those tiny parts, indeed, confuse rebuilds when mixed.
Inspect the rubber seats and springs below the ball. Worn seats, for example, look torn or flattened. Replace seats and springs as one matched kit. Then polish the ball with a soft cloth. Also, check the ball slots for rough edges. A damaged ball, however, needs full replacement instead. So shine light inside and inspect every corner.
How do you reassemble the faucet and test it?
Rebuilding simply reverses your careful teardown steps. Then reassemble faucet in reverse order and check each part as you go. Use your photos whenever your memory feels fuzzy. Also, tighten each nut by hand first. Remember this golden rule: do not overtighten faucet parts during reassembly. Overtight parts, in fact, crack seals and housings.
Firstly, remove your tools and towels from the sink. Then close the faucet handle fully before testing. Next, open the under-sink valves slowly and halfway. Also, watch the base, handle, and spout closely. Finally, test faucet for leaks after repair with the water back on. Run hot and cold water for one minute each. Does the spout stay dry after you close it?
Testing also covers the cabinet space below the sink. Dry every pipe and joint with tissue first. Then touch each joint after running the water. Tissue shows damp spots that fingers often miss. Consequently, tiny weeps become obvious within minutes. Indeed, slow testing now prevents cabinet damage later. Similarly, careful pros test every joint twice always. That patience separates lasting repairs from quick patches.
What should you check if the drip returns?
A returning drip tells you something still mismatches. Firstly, confirm that the washer size matches exactly. Then check the valve seat for hidden roughness. Also, inspect the new O-ring for twists. A twisted ring, for instance, leaks around the handle. So reopen the faucet and inspect calmly again.
Sometimes high water pressure causing faucet drip problems returns even after a repair. High pressure, for example, hammers seals day and night. You can test pressure with a simple gauge. That gauge screws onto an outdoor tap easily. Still, pressure fixes often need professional adjustment later. Indeed, knowing your limits protects your home well.
Home systems also interact in surprising ways, though. Heating faults can confuse diagnosis, much like air conditioning repair services separate faults from myths for homeowners. So rule out one cause at a time. Also, recheck the supply lines for slow weeps. Then dry everything and watch one full hour. Does the drip slow, stop, or stay steady?
When to call a plumber for a faucet leak?
Some jobs truly belong with a trained plumber. Call one when pipes look green, rusty, or swollen. Also, call one when shutoff valves fail completely. A valve that will not close, for instance, blocks safe work. Likewise, call help when the faucet body cracks. Indeed, cracked bodies rarely accept a lasting repair.
Also, stop when you feel unsure at any stage. Doubt, in fact, signals real risk with water. A short professional visit costs less than flooding damage. Behind every good tradesperson sits real training, much like starting a successful home service business demands skill and trust. So ask neighbours for plumber recommendations you trust. Then describe your faucet type before booking help.
How to prevent future faucet drips?
Prevention keeps your repair working for many years. Firstly, close handles gently and never force them. Excess force, for example, crushes washers very early. Also, clean aerators every few months at home. Grit in aerators, indeed, raises pressure on seals. So unscrew the aerator and rinse it well.
Secondly, fix small weeps the week you notice them. Small leaks, in contrast, grow quietly behind cabinets. Also, check under every sink each month quickly. That habit pairs well with wider routines like cheap ways to improve home security during seasonal home checks. Together, these checks catch problems while cheap. Indeed, ten monthly minutes protect your whole home.
Which smart habits protect your plumbing every day?
Smart leak sensors add an early warning layer. Many 5 innovative smart home devices now include small water alarms for cabinets. Those alarms beep loudly at the first damp patch. Also, keep spare washers in a labelled drawer. Then a future drip becomes a quick task. Clearly, preparation turns emergencies into routine maintenance jobs.
Good maintenance also protects your wider home value. Careful owners plan indoor checks alongside projects like budget-friendly backyard makeovers each spring season. Similarly, they value how backyard designs that increase home value reward steady upkeep outdoors. Indoors, dry cabinets and quiet taps impress buyers too. Above all, gentle use keeps seals alive longer. So treat every handle with patience from today.
Frequently asked questions
How long does a beginner faucet repair usually take?
Most beginners finish within thirty to ninety minutes total. Compression repairs, for example, often take the longest time. Cartridge swaps, in contrast, can take twenty minutes. Also, your first repair always runs slower naturally. As a result, allow extra time and stay calm. Indeed, careful work beats fast work every time.
Can you fix a dripping faucet without turning water off?
No, you should never open a faucet under pressure. Water can spray out and flood the cabinet fast. Always close the under-sink valves before removing parts. Then drain the line through the open faucet. Still unsure about your valves at home? In that case, close the main home supply instead.
Which part fails most often in a dripping faucet?
Worn washers and O-rings cause most household drips. Heat and friction, for instance, harden rubber over time. Cartridges also wear out in many modern faucets. Also, rough valve seats destroy new washers quickly. Therefore, inspect every seal whenever you open the faucet. Indeed, replacing all cheap seals together saves repeat work.
Do you need plumber’s grease on every new seal?
Yes, a thin layer helps most rubber seals greatly. Grease lets O-rings slide without twisting or tearing. Also, it slows rubber drying inside hot lines. Use only grease made for plumbing seals, though. Petroleum products, in contrast, can damage some rubber parts. So check the product label before you apply it.
Why does the faucet still drip after a new washer?
A rough valve seat often causes that stubborn drip. The seat surface, for example, may hold grooves or pits. Also, the washer size may mismatch the stem slightly. Then water slips past even a new washer. So inspect the seat with light and touch. Indeed, smooth seats and matched washers seal properly.
When should you replace the whole faucet instead?
Replace the faucet when its body cracks or corrodes. Also, replace it when parts become impossible to find. Heavy rust, in fact, weakens threads and seals alike. A new faucet also makes sense during renovations. Still, most simple drips need only cheap seals. So try the repair first whenever the body looks sound.