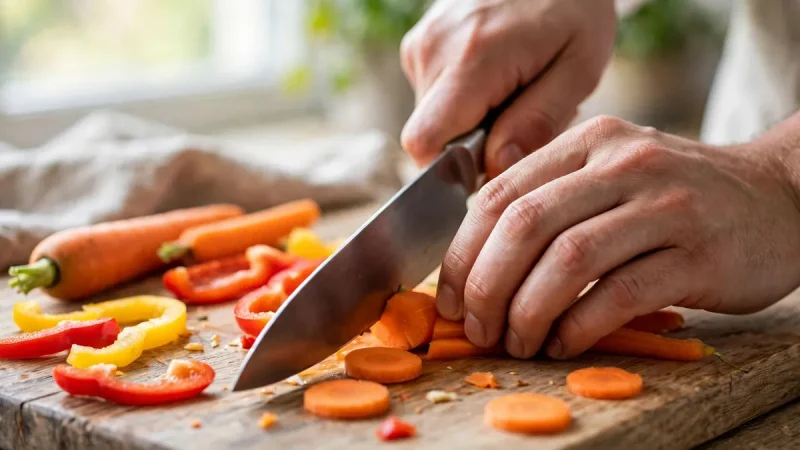

Your knife feels awkward, your onion pieces look uneven, and dinner prep takes forever. Sound familiar? Learning basic knife skills for beginners changes that feeling surprisingly fast. First, you hold the knife with control instead of force. Then, your cuts become even, calm, and repeatable.
Initially, you will learn the grips that protect your fingers. Next, you will practise the core cuts one by one. Also, you will learn which knife suits which job. Finally, you will finish with simple drills that build confidence at home.
Why do basic knife skills for beginners matter so much?
Good technique saves time before it saves anything else. For example, an onion takes minutes when you wrestle with it. Meanwhile, your other hand feeds the food slowly and safely.
Even cuts also cook evenly, and that changes flavour. Small pieces burn while big chunks stay raw in a rushed pan. So, neat knife work quietly improves almost every meal you cook.
Safety sits at the centre of all of this. That is exactly why a sharp knife is safer than a dull knife in daily cooking. A sharp blade bites cleanly and follows your direction. However, a dull blade slips on skins and forces you to push harder.
What safety rules should you learn before your first cut?
Dry hands matter more than beginners expect. Wet handles slide, and wet food skates across the board. So, keep a clean towel beside your board at all times. Then, your grip stays steady from the first slice onward.
Flat sides keep round food from rolling away. First, slice a thin piece off a potato or onion. Next, rest that flat side down on the board. Consequently, the food stays still while you work.
Never try to catch a falling knife. Instead, step back and let the knife drop completely. Afterwards, pick it up carefully by the handle. Similarly, never leave a knife hidden inside a sink of soapy water.
Storage protects everyone who shares your kitchen. Ideally, knives live in a block, on a magnetic strip, or in blade guards. Loose knives in a drawer rattle, dull quickly, and surprise searching hands. Above all, keep knives well away from children at every stage.
Which common knife safety mistakes beginners make most often?
Most common knife safety mistakes beginners make start with speed. Rushing leads the list, because hurry pulls fingertips into the blade path. Curling your fingers flat against the food creates the same danger. Also, cutting towards your body removes your margin for error.
Dull blades cause another classic mistake. People push harder, lean in, and lose control gradually. Rather than forcing a tired edge, stop and maintain the knife.
Pinch grip vs handle grip knife: which grip should you learn first?
The pinch grip vs handle grip knife debate confuses many new cooks. Both grips hold the same knife in different ways. However, only one grip gives you real control over the blade. Chefs overwhelmingly choose the pinch grip for daily work.
How do you form the pinch grip step by step?
First, rest the knife flat in your open palm. Then, slide your thumb and index finger forward onto the blade itself. Pinch the flat sides of the blade just ahead of the handle. Afterwards, wrap your remaining three fingers around the handle below. Your hand now sits high, close to the cutting edge.
This position feels strange for about ten minutes. Nevertheless, the control arrives quickly once you start cutting. The blade becomes an extension of your hand rather than a tool you squeeze. Consequently, long prep sessions tire your hand far less.
When does the handle grip let you down?
The handle grip wraps all four fingers around the handle alone. Admittedly, this grip feels familiar, like holding a hammer. Unfortunately, the blade wobbles because your control point sits too far back. Small twists in your wrist then become big movements at the edge.
Beginners also tend to squeeze harder with this grip. Tension travels up the arm and makes cuts jerky. Instead, loosen your hand and move up into the pinch. Learn the pinch first, and your other skills will follow faster.
Claw grip technique for cutting safely: how does your guiding hand work?
Your guiding hand matters as much as your knife hand. The claw grip technique for cutting safely curls your fingertips safely backwards. First, shape your free hand like a loose claw on the food. Then, tuck your fingertips in, away from the blade path. Your knuckles should face the flat side of the knife.
Now, rest the blade gently against those knuckles. Thus, the steel glances off bone-hard knuckles instead of soft fingertips. As you cut, walk the claw slowly backwards across the food. Also, keep your thumb tucked behind your fingers at all times.
At first, the claw feels slow and clumsy. For instance, cucumbers may still wobble under your fingers. Practise on soft foods until the shape becomes automatic. Soon, your knuckles and blade will move together without thought.
Which knives do you actually need at home?
Three knives cover nearly every job in a home kitchen. This simple breakdown of chef knife paring knife serrated knife uses explains each role. First, the chef knife handles chopping, slicing, and dicing daily. Its curved edge supports rocking cuts and long smooth slices. Most home cooking starts and ends with this one versatile blade.
Next, the paring knife handles small, delicate work in your hand. For example, it hulls strawberries, peels ginger, and trims bruised spots. Then, the serrated knife tackles crusts, rinds, and soft skins. Those teeth grip surfaces that a smooth edge would skate across.
A chef knife also slices cooked meat cleanly at the table. For instance, it glides through a rested steak from Bobby Flay’s perfectly seasoned steak recipe without tearing the crust. Similarly, a serrated blade cuts cake without dragging crumbs everywhere. It serves neat slices from a flourless chocolate cake recipe beautifully.
How to chop an onion safely, step by step?
Learning how to chop an onion safely removes a big beginner fear. First, cut the onion in half through the root end. Then, peel away the papery skin from each half. Place one half flat side down so it cannot roll. Finally, keep the root end intact, because it holds everything together.
Next, make horizontal cuts towards the root, stopping just before it. Afterwards, make vertical cuts down through the layers in the same way. Your claw grip guards your fingers throughout both passes. Then, slice across the onion and watch neat pieces fall away. The intact root keeps the layers from scattering across your board.
Tears bother many cooks during this job. Chilling the onion briefly can soften that sting a little. Also, a sharp blade crushes fewer cells and releases less spray.
How to dice vegetables evenly without rushing?
Understanding how to dice vegetables evenly starts with flat surfaces. First, trim a thin slice from one side of the vegetable. Then, rest that flat side down for total stability. Next, cut the vegetable into even planks of equal thickness. Afterwards, stack the planks and cut them into matching sticks.
Finally, line up the sticks and cut across them evenly. Your pieces now share roughly the same size and shape. Consequently, they cook at the same speed in any pan. Carrots, peppers, courgettes, and potatoes all follow this same simple sequence.
Even pieces matter hugely in fast cooking methods. For example, uneven chunks finish at wildly different times in an air fryer. Checking an air fryer cooking time chart helps only when your pieces actually match.
How to mince garlic properly without a sticky mess?
Knowing how to mince garlic properly saves time and fingers. First, separate one clove and place it under your blade. Then, press down firmly with the flat side and your palm. The skin loosens instantly and peels away in one piece. Afterwards, trim the hard root end with your paring knife.
Next, slice the clove thinly with your claw grip guarding you. Then, gather the slices into a small, tight pile. Rock your chef knife through the pile several times. Also, scrape the pile back together between each pass. Finally, stop once the garlic looks fine, soft, and paste-like.
Garlic rewards patience because tiny pieces release huge flavour. That depth explains the secret ingredient top chefs swear by in so many savoury dishes. However, burnt garlic turns bitter very quickly in a hot pan. So, add minced garlic late and watch it closely.
Julienne cut explained with examples: when do matchsticks help?
With the julienne cut explained with examples, thin matchsticks finally make sense. Julienne means cutting food into long, thin, even sticks. First, trim the vegetable into a neat rectangular block. Then, slice that block into thin, even planks.
Next, stack the planks and slice them into thin sticks. Each stick should look roughly like a matchstick in size. For example, julienned carrots soften quickly inside spring rolls and stir-fries. Similarly, julienned peppers add crunch and colour to fresh salads. Because the sticks stay thin, they cook fast and evenly.
Presentation improves with this cut as well. Neat matchsticks pile elegantly on noodles, slaws, and rice bowls. Practise julienne on firm carrots before softer vegetables.
Chiffonade technique for leafy herbs: how do you roll ribbons?
Basil ribbons look fancy, yet the technique stays wonderfully simple. The chiffonade technique for leafy herbs turns leaves into fine ribbons. First, stack several clean, dry leaves on top of each other. Then, roll the stack tightly into a small cigar shape. Hold that roll steady with a gentle claw grip.
Next, slice across the roll with smooth, thin strokes. Afterwards, unfurl the slices with your fingertips and watch ribbons appear. Basil, mint, spinach, and sorrel all respond beautifully to chiffonade.
Ribbons also transform simple plates into something special. For instance, scattered basil makes plain pasta look restaurant-ready. That finishing touch links nicely with the ideas in this guide to food photography lighting for prettier plates.
Rocking motion chopping technique: how do you keep the tip down?
Herbs and garlic love a blade that never fully leaves the board. The rocking motion chopping technique keeps the knife tip anchored throughout. First, rest the tip of your chef knife on the board. Then, raise and lower the handle like a gentle lever. Your other hand can rest lightly on the spine for control.
As the handle moves, walk the blade slowly across the pile. Also, regather the pile with the blade between passes. Then, rock again until the pieces reach your preferred size. Parsley, coriander, and spring onions all chop beautifully this way. Indeed, the motion feels rhythmic once your shoulders relax.
Beginners often lift the whole knife between cuts. That habit wastes energy and scatters food everywhere. Instead, anchor the tip and let the curve do the work.
How to slice tomatoes without crushing them?
Ripe tomatoes punish dull blades and heavy hands instantly. Learning how to slice tomatoes without crushing them starts with the right knife. First, choose your serrated knife for very soft, ripe fruit. Its teeth bite the skin before the flesh can collapse. Then, use gentle back-and-forth sawing instead of downward pressure.
Alternatively, a truly sharp chef knife slices tomatoes cleanly too. Draw the blade towards you in one long, smooth stroke. Also, let the edge do the cutting while your hand stays light. Thick pressure squeezes juice out and flattens each round slice. Finally, season the slices soon after cutting for the best texture.
Practice helps here because tomato skin feels deceptively tough. Start with firmer tomatoes while your sawing motion settles. Then, move to softer fruit as your confidence grows.
Honing vs sharpening a knife difference: what does each job do?
Many cooks mix up two very different maintenance jobs. Understanding the honing vs sharpening a knife difference clears that confusion. Honing realigns an edge that has bent slightly during use. The steel rod simply pushes that edge back to centre. Consequently, honing restores keenness without removing any metal at all.
Sharpening, by contrast, grinds a fresh edge onto the blade. A whetstone or sharpener removes a tiny amount of metal. Thus, sharpening fixes an edge that honing can no longer rescue. Most home cooks hone often and sharpen only occasionally. That balance keeps a good knife performing for many years.
Think of honing as straightening and sharpening as rebuilding. For example, you might hone before a big Sunday prep session. However, you would sharpen after months of daily board work.
How to keep a kitchen knife sharp day after day?
Daily habits decide how to keep a kitchen knife sharp far more than tools. First, cut on wood or soft plastic boards only. Glass, stone, and metal surfaces destroy edges remarkably fast. Also, scrape food off the board with the spine, never the edge. Dragging the sharp edge sideways dulls it with every single pass.
Washing habits matter just as much. Ideally, wash your knife by hand right after use. Then, dry it fully and store it safely straight away. Dishwashers bang blades against racks and other hard objects. Small routines like these protect your investment quietly every day.
Honing regularly completes the picture. A few gentle passes before cooking realign the edge nicely. Also, avoid using your chef knife on bones or frozen food.
What cutting board safety and stability tips keep everything steady?
These cutting board safety and stability tips prevent most board accidents. First, place a damp cloth or mat under your board. That simple layer stops the board sliding across the counter. Next, choose a board big enough for your knife and food together. Cramped boards push ingredients towards the edge and your fingers.
Also, keep the board surface clean and dry while you work. Pools of juice turn any board into a skating rink. Wipe the surface between different ingredients as you go. Finally, replace boards with deep grooves that trap moisture and food.
Knife skills practice drills at home: how can you improve safely?
Deliberate practice turns shaky cuts into calm habits quickly. These knife skills practice drills at home use cheap, forgiving vegetables. First, try the cucumber drill for your claw grip. Slice one cucumber into coins as evenly as you can. Then, compare the coins and notice where your spacing drifted.
Next, practise the onion drill twice a week. Focus purely on keeping the root intact and fingers tucked. Also, try the carrot stick drill for your julienne spacing. Cut carrots into sticks, then turn those sticks into even dice. Afterwards, cook your practice pieces, because nothing should go to waste.
Herb drills build speed without any real danger. Rock through a big bunch of parsley until it looks fine. Then, check whether the board stayed tidy or scattered everywhere.
Once your cuts look even, put them to delicious use. Evenly cut chicken pieces cook predictably in this air fryer chicken breast recipe for a weeknight test. Afterwards, reward a good practice week with a simple homemade treat. These chocolate dipped pretzels make a cheerful, easy celebration. Progress tastes better when you actually eat your homework.
Frequently asked questions
Which knife should a complete beginner buy first?
Start with one comfortable chef knife that fits your hand. First, it covers chopping, slicing, and dicing for most meals. Also, a mid-sized blade feels less intimidating than a very long one. Then, add a paring knife and a serrated knife later. Three good knives beat a large block of poor ones.
How often should you hone and sharpen your knife?
Hone lightly before regular cooking sessions to realign the edge. Then, sharpen only when honing stops restoring that easy bite. Most home cooks sharpen a few times a year. However, heavy daily use may demand slightly more frequent sharpening. Let the blade tell you, rather than following a strict calendar.
Why do my vegetable pieces always come out uneven?
Uneven pieces usually start with round, rolling food. First, create a flat side and rest it down firmly. Next, cut planks, sticks, and dice in that strict order. Also, slow down until your spacing becomes consistent. Evenness grows from sequence and patience, not natural talent.
Can you learn good knife skills without any classes?
Yes, most home cooks build solid skills through steady home practice. Start with grips and the claw before chasing speed. Then, repeat simple drills on cheap vegetables each week. Also, watch your fingers more than the clock at first. Confidence and pace arrive together after a few weeks.
What should you do if your knife starts slipping?
Stop cutting immediately and reset your whole setup calmly. First, dry your hands, the handle, and the food surface. Next, check whether a damp cloth sits under your board. Also, consider whether the blade needs honing or sharpening. Restart slowly only after everything feels stable again.
How long does it take to feel confident with a knife?
Most beginners feel noticeably steadier after a few weeks of practice. Short, regular sessions beat one long, tiring session easily. For example, fifteen focused minutes twice a week builds real habits. Then, everyday dinners become your ongoing practice ground. Soon, prep feels calm, rhythmic, and genuinely enjoyable.